Bird photography lessons at Brazos Bend
“It’s like going to the gym. You gotta do it and put in the work.” That was Andrew, our instructor explaining to our class of five that if we’re going to get good at photographing wildlife we have to put in the work.
I know this. I’ve read Malcolm Gladwell’s Outliers, where he explains that people who are really good at what they do have put in thousands of hours of practice. So that’s why Steve and I are here on this wildlife photography field trip at Brazos Bend State Park, a 5,000 acre Texas state park, which is about an hour outside of Houston.

Brazos Bend State Park, Texas. Shot with iPhone 7.
We have a Nikon D7000 DLSR and it’s the second DSLR camera we’ve had since we married ten years ago. Neither of us know what we’re really doing when it comes to photography and we’ve been shooting in auto mode the whole time. Essentially, we’ve been treating our camera like a point-and-shoot, which is totally wrong, and so every year I try to climb out of that bad habit and set a New Year’s Resolution to quit shooting in auto mode.
It never seems to work. I don’t have enough fingers to count how many times I’ve taken a one-hour class at a local camera store so I can learn the basics, but that doesn’t seem to be working. I pretty much forget about what the instructor says about aperture f-stops and ISO by the time I get home. What does stick, though is the rule of thirds–but that’s about composition and all my years in the advertising/marketing communications field has taught me a lot about what looks good and what doesn’t, so I’ve got that one down and instructors can just quit talking about it, so let’s move on. But for the life of me I can’t get the basics to make sense to me, mostly because I don’t take the time to dedicate myself every weekend to get outside with my camera and take some photos. By the way, I’m not exactly consistent at going to the gym every day either, so there’s that.
I’ve always known that I need to get my instruction in the field, so when we found this class advertised through Precision Camera & Video—our local camera store in Austin—we jumped on it. Plus, Brazos Bend State Park was on our list of parks to visit because, not only is it birdy, but there are also alligators in the park.
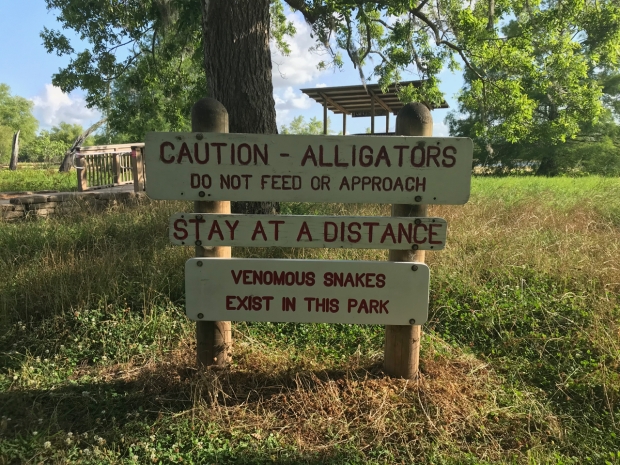
Yes, lots of alligators. And I nearly stepped on a Water Moccasin (snake) that crossed in front of me on the path.
The first evening we all met on a park bench under giant live oak trees that were probably over a hundred years old. The dried moss dripped from their wriggly, thick limbs and swayed in the breeze, reminding me of stockings drying on a clothes line–almost dancing. We were at 40-Acre Lake, which is a bit of a stretch if you call it a lake. It’s mostly an expansive swamp marsh area surrounded by Tallgrass prarie and where alligators lurk and wading birds gingerly step through grasses and leaves on the water as they hunt. It was hard paying attention to our instructor, Andrew, as I watched the sun begin to settle in toward the horizon while Black-bellied Whistling Ducks took to the sky to begin their evening shift of feeding.
We were only getting acquainted with each other this evening and signing forms saying that Andrew wasn’t responsible if we got eaten by an alligator. The next day we were going to get up early to begin the class, just after the sun rises. After we all got done signing the forms, Andrew had us go around the table and share our level of experience and what we hoped to get out of the class.
I suppose the first step in changing your life involves admitting you have a problem.
“I only know how to shoot in auto,” I confessed.
“I’ll be getting you to change that,” Andrew said confidently.
And I added, “I need help with shooting pictures of white birds. They come out super overexposed with a blast of white.”
“I can help you with that,” Andrew assured me.
Thank goodness, I thought, believing that I was going to solve all my problems in one day.
Lesson 1: Know what you need to fix
It didn’t take long the next morning to find a white bird to prove my complete incompetence. The sky was blue with only a few, puffy white clouds in the sky, so the sun was shining bright. Everything glistened and birds were busy skulking around looking for food. Soon after we started on the trail around the marsh I was excited to find an immature Little Blue Heron whose feathers were just starting to turn into their deep blue. I guessed at my settings and as predicted, the bird came out blindingly white.

A terrible photo of an Immature Little Blue Heron. Nikon D7000 with Sigma 150mm-600mm lens; ISO 900, .33ev, f6 at 450 mm using tripod and cropped in to show how really crappy this is.
For the past five years or so this is what has been happening when I take pictures of white birds in bright light, particularly at a distance. Clearly “auto” mode does not mean “You will always take awesome photos.”
Every professional photographer just rolled their eyes at me. Go ahead. I totally deserve that eye roll.
I adjusted the little dial on my camera to take down the exposure. It’s not perfect by a long shot, but a total improvement.

A better image of the Immature Little Blue Heron. At least you can now see the blue on its wings and varying shades of white. Nikon D7000 with Sigma 150-600mm lens; ISO 400, -1.33ev, f6.3 at 600mm using a tripod. This photo not cropped and I didn’t do any editing in post. It’s still not close to perfect, but definitely better than above.
I won’t lie. I still didn’t know what I was doing, but I do think I’m getting better. I think. It’s going to take some time—a lot of time—and it’s not going to be just about using the camera. I need to study what I’ve done so I know what to do or not do next time. Usually when I get back home and load the photos on my computer I do a massive dump of all the crummy photos into the trash. But this time I’m hanging on to bad ones as well as ones that somehow, miraculously turned out better than expected. I’m studying the “info” in the photo editing software to become familiar with my settings of both the crappy photos and the ones that seemed to be an improvement. Hopefully, this will stick.
Lesson 2: Wait for a good moment
Photographing birds with a bunch of birders can be a real challenge. I get really frustrated and impatient with myself when I’m on a birding trip with other birders and they want to tick their list and move on. Me? I want to hang around and look for a good moment. I also like to just observe birds even if I don’t have my camera with me. It was refreshing being in a group this past weekend where the objective was to get a good shot and take our time.
The rest of the group had moved on when I found this White Ibis trying to eat a crawdad whole. It took me awhile to get the shot I wanted–sometimes his back would face me, he’d then drop the crawdad then pick it up again, then some reeds got in the way. But finally he moved into a better position and actually swallowed the crawdad whole.

White Ibis with Crawdad. Nikon D7000 with Sigma 150-600mm lens; ISO 1100, 0 ev, f6 at 440mm using a tripod. Not cropped.

White Ibis swallowing the crawdad whole! Nikon D7000 with Sigma 150-600mm lens; ISO 1000, 0 ev, f6 at 440mm using a tripod. Not cropped.
Waiting for a moment is not the kind of thing I could do on a regular birding trip with others around. I would make so many enemies if I stood around waiting. Fortunately, Steve and I tend to travel on our own and hire private bird guides, allowing us to take birding at a slow pace, to spend time observing and to take photos. And some birding tour companies like Tropical Birding recognize the growth of birders who like photography, so they have tours specifically for birders who want to spend time snapping pictures of birds, assuring enough time to set up the shot and wait for something exciting to capture.

Alligator. Nikon D7000 with Sigma 150-600mm lens; ISO 450,-33 ev, f6.6 at 550mm using a tripod. Cropped out ~20%.
Lesson 3: Don’t take too many shots
I know this rule sounds weird, but it makes sense for me. When I got my first DSLR camera we were in Belize and I was pretty conservative with pressing the shutter button. Mostly it was because I’m old enough to remember what it was like to shoot with film even if most of my experience was with point and shoot cameras. I remember buying a roll of film that had 24 or 36 shots on it then after a trip you’d take it and put it in an envelope and drive up to a little Kodak booth at the strip mall and wait a week or two to get them back only to have maybe four of the photos come out looking decent. It was expensive and often disappointing. But what was more disappointing was being on a trip in the middle of nowhere and running out of film, so I was always careful about when I pushed the shutter release button. I’d wait for the shot before I’d push that button because I was limited on how many I could take. So it took me some time to get to where I was firing off the shutter on a DSLR like Rosie the Riveter.
Once I started clicking at everything a gazillion times it really became an exercise of “maybe if I keep clicking the shutter button at least one of the photos will come out.” So I turned from conservative clicker to rapidly firing away as I was playing a game of chance. But that meant that I would fill my cards up super fast and have to go through the painful process of editing following a trip. I confess that I’d been easily shooting 600 shots a day. When I would do that on a 10 day trip it adds up, and even though I was deleting it still took time to determine which shots to keep and which to toss.
The “Don’t take too many shots” rule was one of the best things I learned last Saturday. I don’t need six shots of the same bird doing the same thing, particularly if it’s not moving. The only rationale for doing that would be if I were changing my settings. Or if the light moved.
When this Yellow-crowned Night Heron walked out on the path in front of me I was conservative in my shots. I only took eight (really, that’s a small amount compared to what I usually do) and for each shot I made adjustments and ended up with this result:

Yellow-crowned Night Heron. Nikon D7000 with Sigma 150-600mm lens; ISO 220, -1 ev, f5.6 at 310mm using a tripod. Cropped out ~20%.
Lesson #4: Go to the gym everyday
I know this rule to be true. When I was growing up I spent hours playing the piano, practicing scales, repeating the same measures over and over. That’s the only way you get better. I’m just going to have to start using my camera every weekend, even if it’s for just an hour. Frankly, this is going to be the only way I’m going to learn. (I would love to say “every day,” but I still have my day job Monday through Friday.) All the bird and wildlife photographers are putting in the time to be better. This is not the kind of craft that you dial in. You either do it or you don’t. Shooting in auto mode only gets a person so far and you definitely don’t learn anything about the science of light when you’re in auto mode. It’s really more chance and luck when I get a nice shot. Today, DLSRs are so sophisticated and they’re really mini computers in our hands, but sadly, I probably only know 10% of its potential.
So, I’m committing to put in the time. I can’t just set a goal to “get out of auto mode.” I need to put in the work and actually do it. And this past weekend, as frustrating as it was, it actually started to give me confidence in what I’m doing.
Here are more photos from my weekend of learning. And by the way, I am very open to constructive comments and advice from all you photographers out there.

Yellow-crowned Night Heron all fluffed up. Nikon D7000 with Sigma 150-600mm lens; ISO 1600, 0 ev, f6.3 at 600mm using a tripod. Not cropped.
I’m not particularly fond of this next photo. The Green Heron came out nicely but that was at the expense of its surroundings, which came out over exposed. Another important lesson Andrew taught me was that sometimes the conditions just don’t make for a great photo, no matter how hard I try. I was in a very shaded area as was the heron but the sun peaked through occasionally through the forest, complicating it a bit. Sometimes even the best photographers can’t get a great shot when the environment doesn’t cooperate.

Green Heron. Nikon D7000 with Sigma 150-600mm lens; ISO 900, -.67 ev, f6.3 at 550mm using a tripod. Not cropped.
This next photo has some nice things and some not-so-great things. If I had a polarizing filter it would have improved the photo, particularly with the water on the ducks’ bills. It would also take down the brightness a notch. What I really dislike about this photo is similar to what’s going on with the heron photo above—the greenery seems over exposed. I can’t really correct it in editing, so I need to work more on the shot. (You can’t Photoshop your way to being a good photographer.) The other thing I don’t like is from a composition standpoint. Those blasted branches are in the way and totally ruin the shot.

Black-bellied Whistling Ducks. Nikon D7000 with Sigma 150-600mm lens; ISO 220, -.67 ev, f6.3 at 550mm using a tripod. Not cropped.
This last shot is nice except for the grass in the foreground. I would have preferred to see the whole bird. There are still shadows on the neck I don’t like, but at least there’s texture now on the white. For a white bird this is a tremendous improvement for me, but I was closer than other white birds I’ve captured. I think it’s when I’m shooting at a long distance that I get the blasting white. Anyway, this is not a terrible shot.

Great Egret. Nikon D7000 with Sigma 150-600mm lens; ISO 100, -.67 ev, f6.3 at 270mm using a tripod. Not cropped.
I need more classes and in-the-field practice, and better if those two are combined. But it was a fantastic weekend where we discovered a new Texas state park and spent an entire day learning how to use our camera. Seriously, if you have advice I’d love to hear it.
If I’m not out taking photos of birds, you can find me at the gym. I promise.
And for those who are interested, here is the list of birds we saw at Brazos Bend State Park.
Birds seen (and heard) at Brazos Bend State Park
- Black-bellied Whistling Duck
- Mottled Duck
- Least Grebe
- Pied-billed Grebe
- Anhinga
- Least Bittern
- Great Blue Heron
- Great Egret
- Snowy Egret
- Little Blue Heron
- Cattle Egret
- Green Heron
- Yellow-crowned Night Heron
- White Ibis
- Black Vulture
- Turkey Vulture
- Mississippi Kite
- Red-shouldered Hawk
- Red-tailed Hawk
- Crested Caracara
- Purple Gallinule
- Common Moorhen
- Kildeer
- Mourning Dove
- Yellow-billed Cuckoo (heard)
- Barred Owl (heard)
- Common Nighthawk (heard)
- Red-bellied Woodpecker
- Ladder-backed Woodpecker
- Pileated Woodpecker (heard)
- Eastern Phoebe
- Vermillion Flycatcher
- Western Kingbird
- Scissor-tailed Flycatcher
- Loggerhead Shrike
- White-eyed Vireo
- Blue Jay
- American Crow
- Purple Martin
- Northern Rough-winged Swallow
- Barn Swallow
- Carolina Chickadee
- Tufted Titmouse
- Carolina Wren
- Marsh Wren
- American Robin
- Northern Mockingbird
- European Starling
- Prothonotary Warbler
- Swainson’s Warbler (heard)
- Summer Tanager
- Northern Cardinal
- Red-winged Blackbird
- Great-tailed Grackle
- Orchard Oriole
Oh, I’ve been there too, and I’m not talking about just BBSP.
I agree in the ‘going to the gym’ advice. I’d practice with the DSLR at home, saying, ‘I’m gonna shoot that leaf up there,’ then quickly choose settings (ISO first, then shutter, then aperture) with thumb/finger, pull the lens out to 600mm, nail the spot focus though the view finder, and fire – both eyes open. Then I’d check to see how good my instincts were on the view finder. Repeat times 1,000. THEN I’d go birding. Practice doesn’t make perfect, but it DOES build skill. And instincts.
I have never post-processed and feel my photos are ‘good enough,’ being that I’m not selling to Nat Geo or trying to win a photo contest. Just want to collect all my little pretties into a digital flip album for later.
It’s good to know shooting limits as well (low lighting, contrast-y Background’s, fast moving birds) in which case the camera will just hang instead and the binocular comes to my face for a more pleasant experience.
Enjoyed your post,
Ms. Boice. Happy birding and photography! ~ Shannon
LikeLiked by 1 person
PS – great list of birds. The most species I’ve ever seen in 3 hrs at BBSP is 56.
LikeLiked by 1 person
Shannon, thanks for your thoughts, especially about practice building skill. I think the more I practice I’ll start to “get it.” I only post-process because I love to put together Shutterfly books of each birding trip.The books are just for my husband and me because, as I tell him all the time, we’ll have these books to flip through when we’re old, sitting in a senior home and unable to keep up with technology. (And I put the captions in large font, too, because I’m really actually planning for this!) I also make a calendar each year for family, so I just do a little post on photos for that calendar. 🙂
LikeLiked by 2 people
Lisa, I am glad you found a photo workshop! I saw your comment on my FB post a few days ago and realized I never answered you; so sorry! I don’t do workshops but do try to cover photography subjects along with the birds in my blog.
And I think your takeaway on the class is very good. Getting out of Automagic is scary, and it means a lot practice and more effort. Analyzing your images is a good start (ahh… the shutter speed was too slow here to catch him grabbing the fish) and recognizing some conditions will not make a good image (oh, I am facing the sun and the bird has his back to me). And practice! As you get more comfortable with changing settings and responses, think about getting lower to take your shots.
And the light. If you read my blog then you know I prefer overcast and cloudy days. You can shoot from any direction, the birds don’t have harsh shadows from body parts or foliage and the water doesn’t have that bright reflective glare. It is hard when your birding time is limited to weekends, but next time you are out on a cloudy day, crank up that ISO and see what you think. Your camera has a tendency to overexpose (according to some reviews) but drop the f/stop if it seems to bright in the monitor. Shoot, check the monitor for tones and adjust.
Good luck! and a great summary of a motivated beginner’s trials and experiences!
Linda Murdock
LikeLiked by 2 people
Hi Linda! Super advice–thanks! I love reading your blog and I pay attention to your settings, so I think that’s going to be very helpful on my journey of getting out of “auto.” Thanks for the encouragement!
LikeLiked by 1 person
I love lesson #3. I always take too many shots and hate it when I get home and have to go through them. I so love not having to worry about how much film I have left. My early photo days were also in the days of film. Digital photography was just starting and it “was just never going to be as good as film”. Ha!
You have taken some lovely photos. And I do go to the “gym” every weekend.
LikeLiked by 2 people
I was just out on my porch yesterday taking snaps of a darling Bewick’s Wren poking his/her head out of the hole of the bird house we set up. And I found myself wanting to take a gazillion shots. It’s a bad habit I have to break! I took about six, instead, adjusting the ISO each time and,hey! It worked! I ended up with a nice shot.
LikeLiked by 1 person
Hi. I enjoyed your blog. Famous bird photographer Scott Bourne says that you need to handle your camera every day. I don’t quite get every day, but I try to mess with it several times a week.
LikeLiked by 2 people
TRUTH! Thanks for passing that sage advice along. 🙂
LikeLiked by 2 people
That looks like a very useful learning experience. I look forward to a flood of stunning pictures.
LikeLiked by 2 people
Ah geez, now the pressure just skyrocketed. 😉
LikeLiked by 1 person
I love reading your adventures in bird sighting, and enjoyed this post a lot, because, like most bird photographers, I always like reading about “how other people do it”. I take a lot of bird photos and have found a couple of things that work well for me, so I’ll pass them on, for whatever they are worth. Going from auto everything to managing ISO, aperture and shutter speed on every shot is really difficult. So, I cheat a little, as a time saver, and to uncomplicate the process. See #3 below. 🙂
1. I use center-point (spot) exposure metering a lot, especially for very white and very black birds, and especially when the bird is small in the total frame. This is different than using the wider frame evaluative metering, which looks at the average light over the whole scene. (I use this setting for landscape photography). I want the bird to come out with the correct exposure, and if needed, I’ll fix the landscape around it in a photo editor (SnapSeed for quick adjustments on Apple products, Lightroom if I’m using my PC for post-process.)
2. I second the recommendation above to use the very even lighting of an overcast day, or the even lighting of a forest understory and avoid those hard to manage, strong contrasts of light coming through trees, if possible.
3. Now, here’s a suggestion for perhaps uncomplicating the process of transitioning from Auto mode photography. I shoot in aperture priority mode if my subjects are sitting still: f8-11 if they are far away and I need more depth of field of bird and habitat, f5.6 or lower if my subjects are relatively close (I.e., fill most of the frame in the telephoto) or are large. I switch to shutter priority mode (1/1000-1/4000) if my subjects are small and moving a lot, or it’s windy and my telephoto isn’t as stable, or if I’m shooting flying birds. What about ISO? I don’t set it, but leave it on Auto and let the camera make the choice of ISO, as long as it doesn’t get above about 1000 (where images start to look grainy on my camera). That way, you only have one thing to worry about either A (aperture) or S (shutter speed), and the camera is doing the rest of the calculation.
4. Now, having said all that in #3, here’s a caution. If you’re shooting in Ap mode, you still need to be aware of shutter speed and ISO (check the info stats after the shot). In general, your shutter speed should be no LESS than 1/focal length. For example, shooting at 600 mm, your shutter speed should be at least 1/600 sec for optimal image sharpness. That is, unless you’re shooting on a tripod. As I mentioned above, check that the ISO isn’t too high for your camera to process clean images.
Sorry to go on at such great length. I am very familiar with the intimidation factor in moving away from Auto, and am trying to be a cheerleader for you here. Have fun with your next photo shoot.
I wrote about the pale bird in a dark background problem on my blog, if you want an illustration of what I’ve been trying to describe.
LikeLiked by 1 person
Sue, thank you for all of that great advice! And thank you for being my cheerleader. I’m a long ways off from getting comfortable. (It doesn’t help that my husband went to Canada for five weeks and took our camera with him. (Gah! There went all my practice time fresh from our class at Brazos Bend.) But HE’S getting good time in, so that will help us both, I think. And thanks for the link about the pale bird. I’m going to check that out!
LikeLiked by 1 person
That’s a lot of species. I loved reading your description and experience. I am into bird photography too, you might wanna have a look at my blog, may be 😉
Love
Riya
LikeLike
Hi Riya, you have beautiful shots on your site! Thank you for introducing your blog site to me. I look forward to seeing and reading more about your bird photography. 🙂
LikeLike
Thank you so much Boice.
Let’s be connected in here. 🙂
LikeLike
Pingback: Bird photography lessons at Brazos Bend — The Accidental Birder | Social Network of Artistic Professionals